Friday, 20 January 2012

Ribbons and Buttons...Oh My!


Photo credit: Lara Hata, via Country Living
Ribbons and buttons. Oh, how I love them! It's funny how a beautiful piece of ribbon or a unique button can give a little thrill. I once read that buttons are like confectionery for adults - that really resonated with me! That was in Jane Brocket's book, "The Gentle Art of Domesticity". She went on to talk about the sad decline in the number of button shops. Can you imagine - shops that only stock buttons! Not online stores, but real, honest-to-goodness physical stores that are piled from floor to ceiling with beautiful buttons!That is the sort of shop that I could spend hours and hours in, and I am NOT much of a shopper.

These shops DO still exist, apparently, as I found out while looking for pics for this post. I wish Brisbane had some...

Ok, pulling myself out of my daydreaming here. I remember the excitement whenever Mum would get out her button tin for some terribly practical purpose like trying to find a replacement button for a lost one on some trousers. I LOVED trawling through that tin, picking up any that caught my eye, examining them closely, and secretly hoping Mum would say 'you can have that one if you like'. Not that I had any plan in mind for it. I just LIKED it. 

My ribbons on paddle-pop stick bobbins

And ribbons! What joy when a present came wrapped in a bit of REAL ribbon, not just some curling plastic stuff. It was often just as much of a gift as what was inside. That reminds me of a very sweet moment on the second season of BBC TV version of Lark Rise to Candleford, when Robert Timmins buys his wife Emma a piece of ribbon - as I remember it, it was a very romantic gesture, an extravagance they could not afford, but spoke volumes of his love for her.

I have my very own ribbon and button stashes now. Most of my buttons came from op-shops, and many of my ribbons were saved from gifts. For Christmas, my hubby bought me some buttons - does he know me or what? I recently stole his collection of paddle-pop sticks to wind my bits of ribbon on, as they were all jumbled up and making a big mess. The paddle-pop sticks worked a treat, as you can see above!

I used to store my buttons in old jars, which looks so cute, but I find it is not very practical. I like to rifle through the buttons when choosing them for projects, so a shallow container suits better. Or a series of shallow containers with buttons sorted in colours.

Fun, fun, fun! Doesn't this just make you wanna go do some craft??


Monday, 9 January 2012

A New Diary Cover For A New Year

 Can you believe that 2012 is already upon us? I am a little behind, I know. I LOVE NEW YEARS! I have always loved the fresh start, the new diaries, the new school books and stationery, all full of promise for an exciting year ahead. I love writing in my new diary, putting all the important birthday reminders in, scheduling things months ahead of time, anticipating the events...perhaps this is why I just can't get into using a virtual calendar, whether on my phone or computer. It just does not have the same anticipatory thrill for me as writing things on the clean, crisp paper of a new diary.


This year, as last year, I have a Frankie diary. As you can see from the pics (from the Frankie website) to the right, the diary is quite lovely inside and out. However, I have a thing about needing to make a new cover each year. This year, I wanted to try a cute embroidery design I found in a book titled 'Simple Embroidery Designs', published by Ondori. The simple but effective houses on the front cover of this book really caught my eye.

I also wanted to experiment with using carbon paper to transfer designs onto fabric. In the past, I have generally just done freestyle embroidery, or else drawn the design directly onto the fabric with a washable or fading marker. I love the idea of drawing my own designs, or using children's drawings, or my brilliantly talented husband's sketches, but have not really attempted any method of transferring designs onto fabric yet.

As you can see, I have used some of the designs from the book on my diary cover. I wanted the overall style of the cover to reflect a zakka style, hence the natural linen and red linen, plus the running stitch as a feature. I actually decided to hand stitch this cover, as I felt it was right for the style.


On the whole, I am fairly happy with how it turned out, except that I probably need to add some interfacing for more stability. Also, there are places where the carbon paper tracing shows through (as shown below). I am not sure how to get rid of that, or if it is possible - any suggestions? I did try hand-washing the fabric, but it didn't seem to make much of a difference. I guess I just need to be more careful with the process of tracing the design in the first place. Oh well, that is what experimenting is for, right?


Tuesday, 20 December 2011

Button on Canvas Name Plaque


I've taken a hiatus from the Quiet Book at present, to do a quick project for my little man. We had been planning on having our two kidlets share a bedroom, so I had not spent any time preparing a nursery, as it was already set up.


However...things do not always go to plan. My poor darling daughter happens to take after me, and apparently just cannot sleep with Mr T in her room, even when he is happily (albeit noisily) asleep. We discovered this after a night of madam lying awake crying out 'Mumma, Mumma, Mumma, baby squeaking a little bit!' OVER AND OVER AND OVER AGAIN, until I finally gave in and moved him into the bassinet in the loungeroom!

So...we have moved the little man into a tiny room of his own, which just happened to already have pale blue walls and blue curtains - appropriate for a little boy, right? But of course, I just had to do some decorating! There is not a lot of wall space in there, but I wanted to brighten things up a bit. When our daughter was born, my hubby did a lovely painting for her with her name spelled out in stars in the night sky. I wanted to do a name piece for our boy.


 I've always loved buttons, and have quite a collection. I have been eying off some button art on Pinterest for a while, so it was the logical choice for a name plaque for Mr T.  I printed out some letters in a font I liked, covered a canvas in white fabric, and set up the buttons as I liked, before carefully gluing them in place.

 It was a little fiddly, and I was totally paranoid that Miss E would bump the canvas when the buttons were placed correctly, but before they were glued...but thankfully we managed to avert any such disaster (though there were a few close calls!). Finished product hanging on the wall within 24 hours :)


Wednesday, 7 December 2011

Quiet Book - Part II

Clothes! Little tiny vintage-style clothes!! YIPPEE!!!

Ummm...can you tell that I am excited about this project??

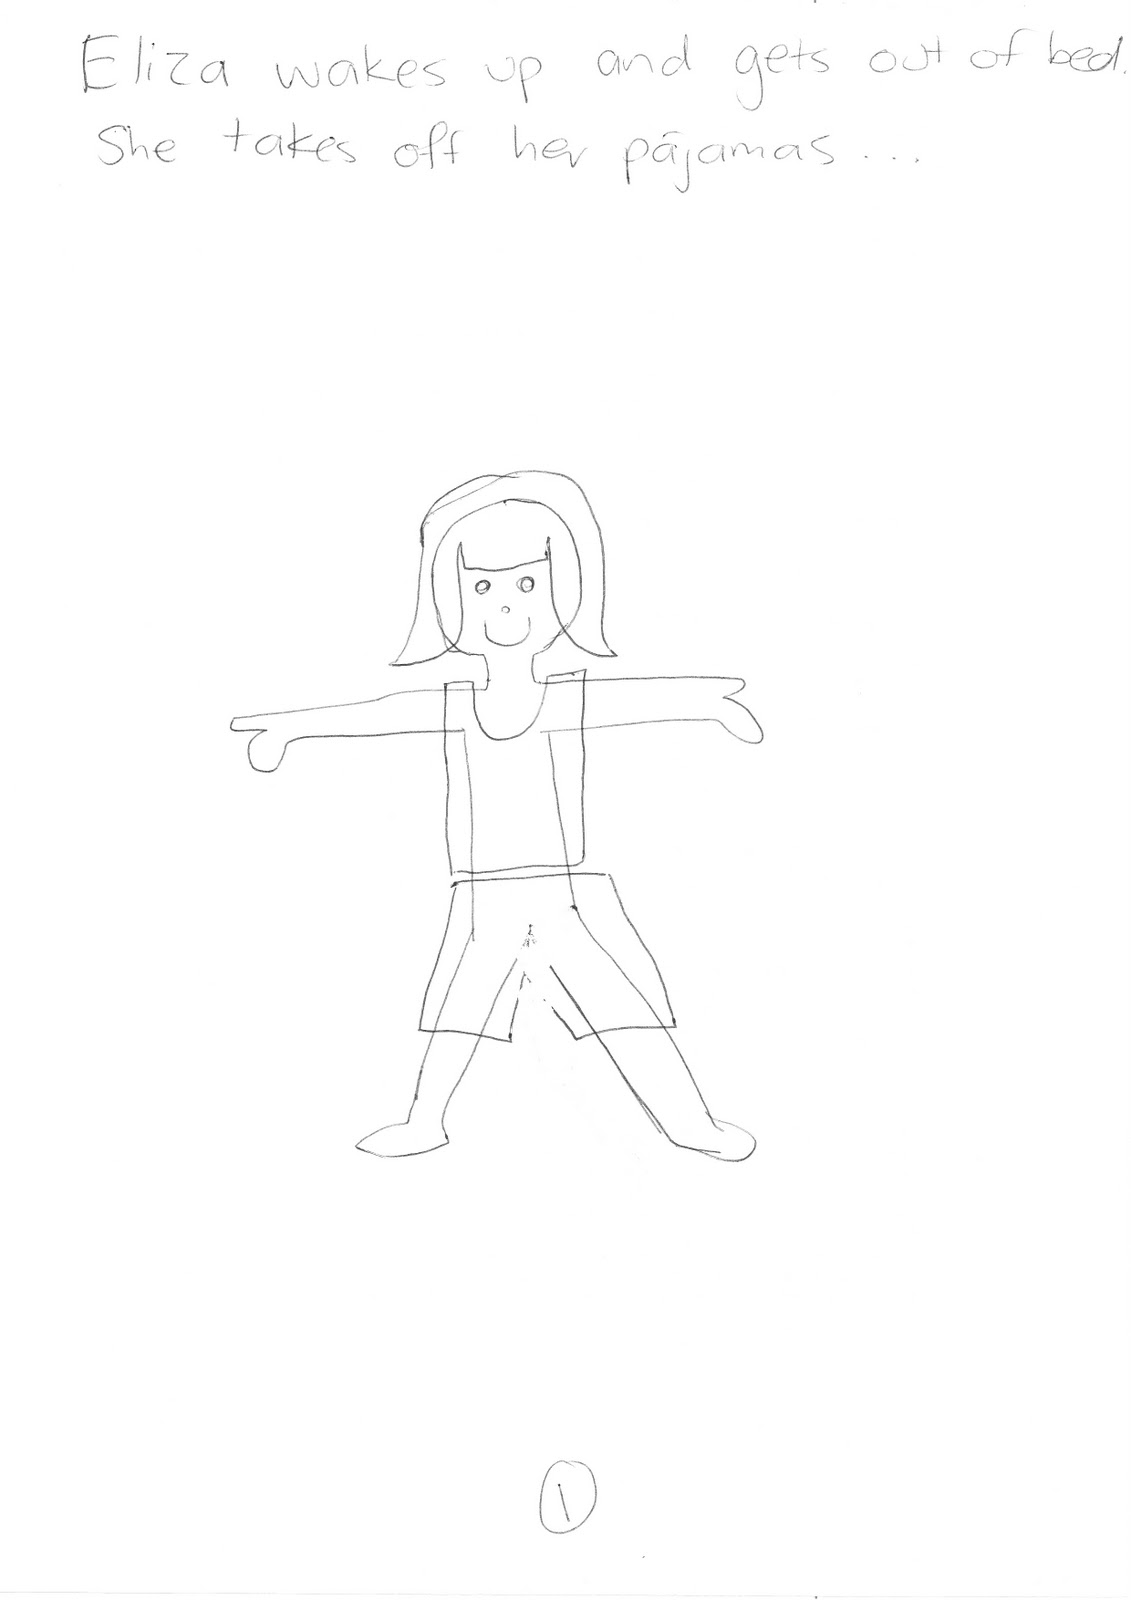
 Okay, so the dress-up doll was always going to be on the first pages of this quiet book. But my initial (very bad) sketches have turned out to be quite different from the end product. I am ashamed to show them, but here are my initial sketches (sorry they are so faint).

The problem was, I just could not get inspired to create that in felt. After a quick Google search for 'felt dolls', I found this blog post, that referenced this Flickr photo by Olivia Mew, shown below. WOW! I wanted to do that, but with little girls' clothes!

I have always loved paper dolls and their cute little outfits, so I decided to draw inspiration from the paper doll concept. I did some research online and found this awesome site featuring the Betsy McCall doll from several decades of McCalls magazines. JUST WHAT I WAS LOOKING FOR!  I have used the shape of one of the Betsy McCall paper dolls and used the basic shapes of several of the dresses and other little outfits.


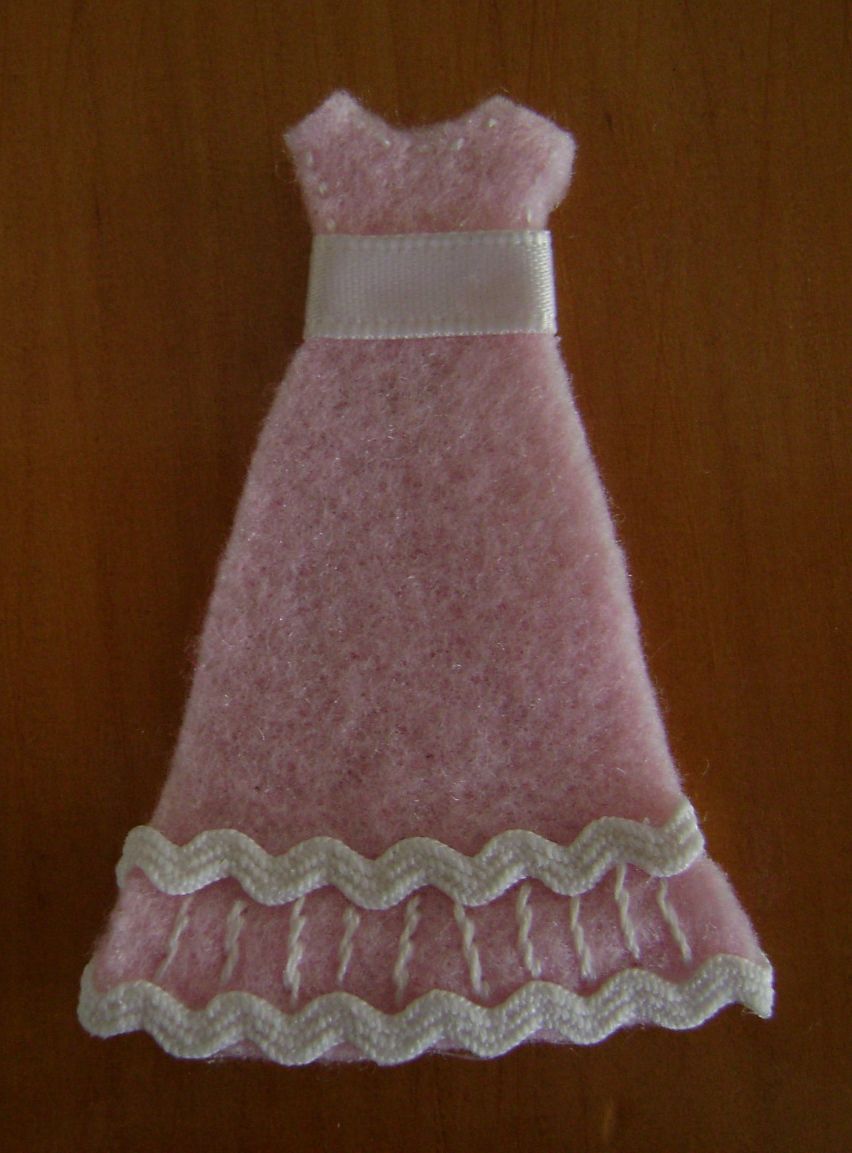
The dress on the bottom right is the inspiration for the teal dress shown at the top of the post. I have cut the outfits out of felt and then added detail in embroidery and embellished with beads, ribbons, and so on.

I am really, really, really, REALLY enjoying this phase of the quiet book project!! It brings out the little girl in me...probably a little too much. My husband suggested that I would enjoy playing with it as much as our daughter would, and that I would probably cry if our she loses or damages any of these little clothes - that's a bit too close to the truth for comfort! But I really want it to be something that she loves and gets use from for years to come.

We had a quiet book growing up, which my mother still has. We always loved it, and now my daughter and niece and nephew love to play with it when they visit Grandma. There is something special about handmade toys that are loved over generations. Maybe I am being too ambitious, but that is what I hope to create.

My hubby arrived home as I was working on this the other night...while simultaneously breastfeeding. He thought it was too funny and actually went to the trouble of locating the camera and snapping a pic to document the moment - this is rather out of character for him!

The process of making these little clothes is rather time-consuming, but OH-SO-FUN! It feels even more drawn out, as I start it, then get called away to help Miss E on the potty, then return to do a few more stitches, then have to tend to Mr T who is squawking for food and so on. So why not keep sewing while he feeds, hey?

Now my big dilemma is WHERE DO I STOP?? Ah, the age-old question - how many clothes does a girl need? Or probably, in this case, how can I force myself to stop making these adorable and addictive little bits of craftiness??

This particular girl's wardrobe currently contains the following completed items:


 And I already have another eleven items cut out and ready to sew...


Quiet Book - Part I

Hurray! I have made a start on the quiet book that I wanted to make for my daughter's Christmas present. Although it is far more realistic that it will be an Easter present, or even next year's birthday present (she's an August girl). I told myself I was going to do a simple book, that the activities would not be too involved, that I would only spend a couple hours on each page...HA!

That idea has gone out the window, but that's okay. I am having far too much fun on it so far. I really enjoy hand stitching and embroidery - I am certainly no expert, but I enjoy it, especially doing tiny detailed stitches. I just hope I will keep up the momentum and manage to complete it to this level of detail.

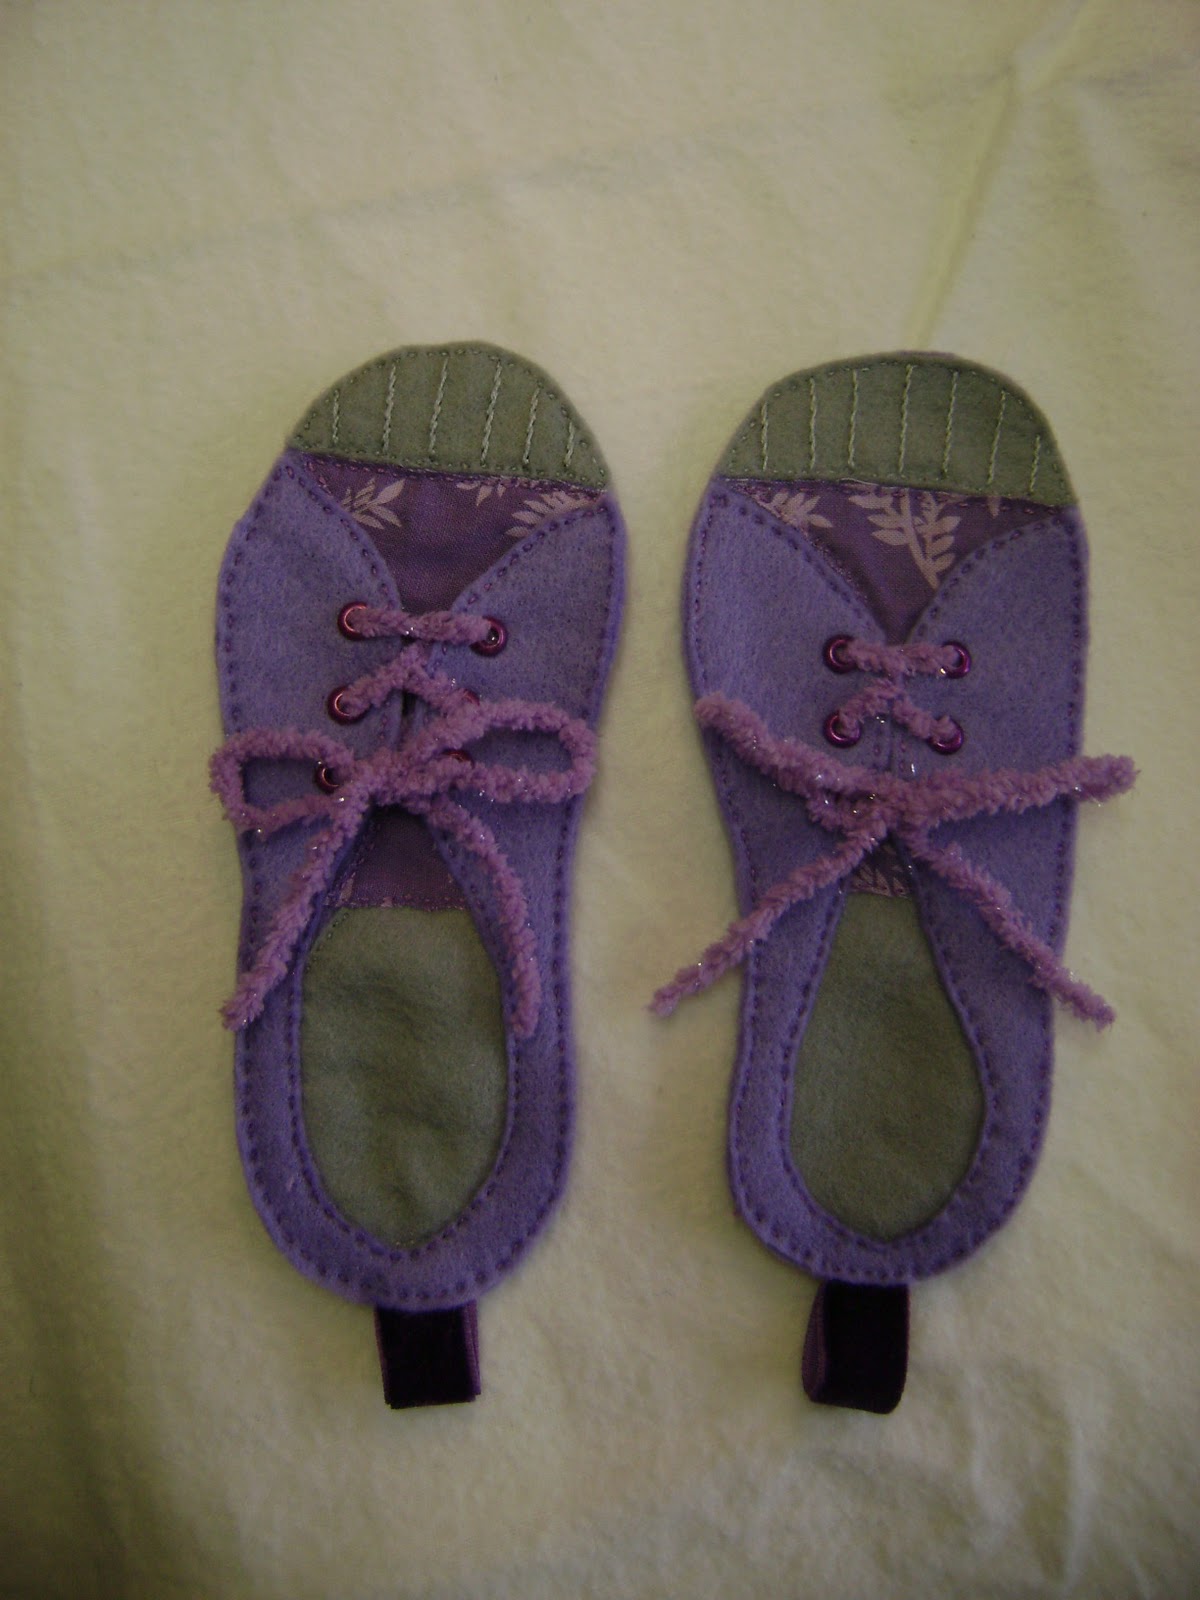
 I decided to start on the shoe-tying page, and to be honest, this page only took a few hours to do. My hubby told me it was too involved, but I laughed that off. To the left is my original sketch of this page. As you can see, it is not going to be the first page in the book. It just seemed like a simple place to start.

I used a pair of shoes that currently fit my daughter, and traced around those - they were just a perfect size for an A4 sized book. I used felt, some fabric scraps, some yarn and ribbon scraps, cute purple eyelets and embroidery thread to create the pair of shoes. You can see the finished product below.


They apparently got the approval of the two-year-old - "Wear it? Wear it now, Mummy?" She then proceeded to attempt to do just that.

Thursday, 1 December 2011

New Arrivals, Decorations and Gift Ideas

Well, it's been a month and a half since my last post. A busy month and a half, mind you, with such happenings as a baby being born and what-not. He is a very lovely little person and tends to make my heart melt at least ten times a day. However, he did not come gentle into this good world...and I am still feeling the effects of his rugged journey. The slow recovery is tiring and if I am not careful, I can end up feeling rather frustrated at being stuck at home for so long. I do try to see the positives in this, having a nice long time to get to know our little man, and plenty of time for our girl to adjust (she needs it, her world has changed in a big way). However, I feel that I am muchly in need of a project to focus on.

In the weeks before baby was born, I was nesting like crazy. I wanted to keep myself busy, and thus started and completed several craft projects, such as some Christmas decorations I was wanting to make (see pics to the right). In the weeks since baby was born, I have often wished I still had some projects on the go that did not require too much thinking, such as the above-mentioned Christmas decorations. Hmmm. I have slowly managed to get my head back into craft mode, with the motivation of making presents for my kids (that's plural now! ha!), and my niece and nephews. I think the projects I have in mind are probably a bit ambitious for the time and energy I have left before Christmas, but we'll see.


I plan to start with a project for my 2-year-old girl, as we are not buying presents for the kids this year. We have just spent too much money renovating their playroom, meaning we can't afford much else, so I guess we are considering that their main gift. But I can't not have something for her to unwrap on Christmas morning! So after much thought, the project I have in mind is a personalised quiet book to help keep her occupied when we are out and about, on car trips, in doctors' waiting rooms, and so on.

I have drawn inspiration from Pinterest once again - or rather, from blogs I have found through Pinterest. This is one I particularly liked. What a gorgeous quiet book, and I love the philosophy behind the blog as well ('How to live in poverty and still have it all').


So at first I was going to make a very similar quiet book to the one mentioned above, but then I had another idea...to do a personalised story-format quiet book for Eliza, about Eliza. I have chosen a morning routine theme, with activities based around things she does each morning (or things I want her to learn to do!). I'll keep you posted as to the progress of this rather involved and fiddly project. Hopefully now that I've got a clear idea in mind, and have done some sketches, I'll get some momentum going and tackle this project with all the angst of a stuck-at-home-because-I'm-too-sore-to-go-out-mother-of-new-baby!!

Thursday, 13 October 2011

My Preparing For Baby Project

The countdown is on! One month today until our due date. Of course, in reality, that  means that baby could come in two weeks, or not for another 6 weeks...The former sounds exciting while the latter sounds torturous at present. 

With baby #2, it seems that there is a lot less to prepare. Since our baby is going to be sharing a room with our two-year-old, we don't even have a nursery to prep. So my main 'prepare for baby' project was to restore a rocking chair. 

I should have taken 'before' photos, but I forgot. We were given this rocking chair by my uncle and aunt, who had used it out on their deck in West End, close to the river. Being somewhat exposed to the weather meant that the varnish had come off and some mould grown on the arm rests, and various other bits of the timber. I sanded back the mould and used oil of cloves to try to kill it off before re-varnishing (which my darling hubby did for me). 


The foam of the cushions had turned to dust almost, so I cut new cushions from an old mattress we had been meaning to throw out. The foam was still good, so that was not an issue. Then I whipped up some rather rough cushion covers from some fabric I had lying around. It was one of those projects where there was only JUST enough fabric to make it, and this impacted on my design for sewing the covers. However, they do the job, and I love the fact that we spent absolutely no money on this project - we were able to use all materials that we already had lying around.
I now have one very comfy rocking chair that promises to be a treat to breastfeed in. So then baby...don't wait too long before coming, ok?

Tuesday, 4 October 2011

Wedding Guest Book Cover

So we have a wedding in our family in a week and a half. The happy couple had difficulty finding a guest book that suited their needs. They eventually found one that ticked their boxes, except for one little detail...THE COVER. On a high from some journal covers I have thoroughly enjoyed making recently, I offered to make a cover for their guest book...

The bride immediately knew what she wanted - a book cover to match their wedding invitations. A lovely idea. So we shopped for fabric together, found some that matched to her liking, and talked through all the details. 
The wedding invitation - the paper has a sheen to it, sorry for the bad pic.
Then came the part where I actually had to MAKE it. Hmmm. Not as simple as I had anticipated. However, I thankfully had the foresight to make sure that we bought enough fabric for me to do a trial run, and let's just say that my second attempt was much better than my first. 

The finished product
Back view

Inside cover

Close-up of the embroidery
Thankfully I managed to complete it with plenty of time to spare. It's certainly not perfect, and I am trying hard to be happy with the end result and not just see all the imperfections. Now I just hope the bridal couple like it!

Sweet Headbands For Baby Girls

 Yes, I am pregnant...34 weeks pregnant in fact. No, I don't know whether the baby is a boy or a girl. But perhaps it is the cluckiness, the memories of Eliza as a newborn, or the fact that several friends have had baby girls recently, but I am just so excited about making cute little girl things at the moment. 
  
Just some simple little yo-yo headbands on shiny elastic. I put a little strip of felt on the back side where the elastic was joined, to cover the stitching so it won't be itchy for the little princess who wears it. 

I couldn't resist trying one of my newly made NEWBORN headbands on my own little model. Now I shall pay the price, as the elastic stretched and I shall have to remake the headband with fresh elastic. Oh well, she looks cute in it. Maybe I should just keep this one for her as it is already stretched. Girls are so fun to make for!

LinkWithin

Related Posts Plugin for WordPress, Blogger...